Project 9: Portfolio

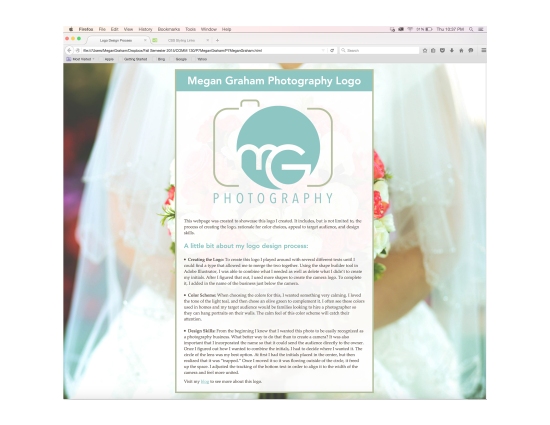
Project: I chose to substitute project corrections with an additional project. For this project I decided to design a gift certificate using my latest logo that I designed for the brochure project. I found a nice texture to use as an overly for the background. To start this project, I looked at several different ideas for inspiration. I really liked one and began creating something similar. As I progressed in the design, I decided that it was way too cluttered and not as professional as I hope. I deleted a lot of the graphics and made the colors more neutral. Not only did this make it look more professional, it made it so this gift certificate could be given at any time of the year, and not just Christmas.

I lowered the opacity of the white bar to make the contrast more subtle. I then made a clipping mask with the logo so the texture background that I created could show through. When I was finished I created two other certificates offering different time frames of photo sessions. Time spent: 2.5 hrs

Message: As a college student, this is a compilation of a wide-variety of projects demonstrating the skill-sets that I have obtained this far in my education.

Audience: Potential clients and employers

Top Thing Learned: It is very important to save your files in an organized fashion and in the same place so you can easily find and access them for future use.

Future application of Visual Media: I will continue to purse both school and self-projects to exercise these skills and add to this portfolio.

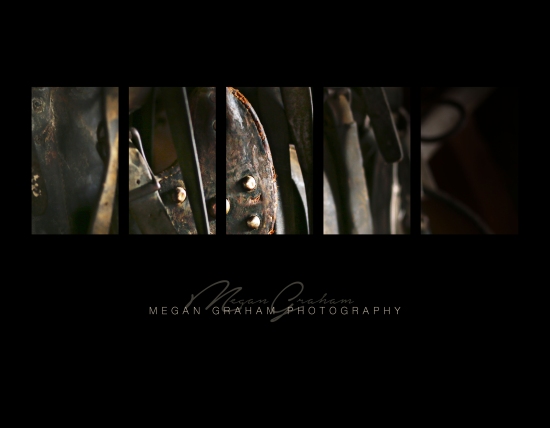
Color scheme and color names: Monochromatic, Charcoal

Title Font Name & Category: Neou, San-serif

Copy Font Name & Category: Georgia, Oldstyle

Thumbnails of Images used:

Cliff Background Image

Sources:
unsplash.com
https://unsplash.com/photos/sP4UZnpSiN4

Final Photobook

I have learned a wide variety of new skills throughout the semester in COMM300. The final project of the class was to design a photo book to showcase the work that we have created over the past several months. It was really fun to make this portfolio and to see how many new things I have learned!

I designed this book using Adobe Indesign. For my titles I used a san-serifed font called Neou and for the body copy I used the old-style font, brela regular.  After I completed designing all of my pages I sent them to MyPublisher and ordered a hard copy.

MeganGraham-Covers

MeganGraham-Photobook

Project 8: Brochure

Front

Front


Inside

Inside

Back

Back

Video Showcase:

Description: A duplex offset folding brochure

Process (Programs, Tools, Skills): The first thing I did was sketch out what I wanted my brochure to look like. Because I am showcasing photography, I wanted a layout that would give me plenty of space to put pictures. Once I got the measurements figured out I used the guides in Adobe InDesign to match exactly what I had measured out on my sketch.

The next step for me was getting all my text put together. I knew that I wanted my pictures on the side bar to match some of the descriptions on the inside of the packet so I spend quite a bit of time searching through some of the wedding photos I have take to decide which photos would work.

On the inside of the brochure, I used a large picture of a bride and groom standing by each other. The text was really hard to read over it so I brought it into Adobe Photoshop and added an offset exposure-blending mode in order to make it a lot lighter. This helped a lot to be able to read.

For the back cover, I wanted to make the logo work with the picture. In Adobe Photoshop, I placed the logo on the image (Designed in Illustrator), and then masked it out where the ring is in the photo. This added a lot more depth. Programs/Tools Used: Adobe InDesign/Adobe Illustrator/Adobe Photoshop

Message: Inform audience about my available wedding day packages

Audience: Brides who have requested additional information about my wedding photography

Top Thing Learned: White space around large portions of text is really important.

Color scheme and color names: Triadic – peach, blue, green

Title Font Name & Category: Lucida Bright Bold – Oldstyle

Copy Font Name & Category: Ludida Bright – Oldstyle

Word Count of copy: 243

Thumbnails of Images used:

Formals-86 thmn25 thmn59 thmn74 thmnBridesmaids-Groomsmen-39blk thmnCeremony-Reception-237 thmnFormals-50blk thmnFormals-86 thmnFormals-5blk

Sources: All Photos were taken by me


Contest


Contest: BYUI Photographics Print Contest
Contest Theme: CRAZY COLOR

PrintContest-MeganGraham

Process: In order to create this shot, I got a black garbage can and taped some black fabric over it. I then took a large clear glass vase and filled it full of water. After that I got several small cups and filled them with heavy cream and colored each on a different color. I had my family members all take an eye dropper, fill it full of the colored cream, and then inject it simultaneously into the water. I was on the group shooting upward and I was synced to a speedlight that was at a 45 degree angle. When I was finished, I rotated the picture upside down to make it look a little more abstract.

Contest: I have been a member of the BYUI Photographics society ever since my first semester at school. So much of what I know about photography has come from the weekly tutorials and contests that have made me stretch beyond the typical portrait session. In fact, I learned how to do this type of photography from a classmate at a weekly tutorial. I chose this contest simply because I thought it was an awesome topic, and would make me do something out of the ordinary.

Contest Link: http://www.byuiphotographics.org/blog-contests/

Date Submitted: November 10, 2015

Light Painting

Process:

This was such a fun class activity. In order to create a light paining it is necessary to have a tripod. You have to set the camera on a long exposure, focus the camera on the subject, click the shutter, and then use a flashlight to paint in whatever details you’d like to show up. It is best when the room is completely dark.

The first thing that I learned is that before you take the picture, you must have someone shine a light on the subject of the picture. You can use autofocus to do this. Once it is set, it is smart to flip it back to manual focus so that when the light is off, the lens doesn’t have a hard time focusing.

The second thing that I learned is that time is super valuable. It was really difficult for me to focus on composing my shot because there were so many other things to worry about. This is a really hard thing to do while being rushed. Give yourself plenty of time and you can come up with some great shots!!

MeganGrahamTravel


MeganGrahamCameras


MeganGrahamClarinet
MeganGrahamOrnaments
MeganGrahamDolls
MeganGrahamMysteryoffset

Project 3: Fine Art Print

MeganGrahamBannackChurchFineArt

Non-edited Bracketed Photos:

MeganGrahamThmNL1MeganGrahamThmNL3MeganGrahamThmNL2

Process: I was asked to print this picture of the old church up in Bannack, Montana.  As soon as I saw this church, I could see what picture I wanted. I used a wide-angle lens and set up my tripod on the steps as low as I could get it in order to create this “towering” look. The lens is difficult to use because it doesn’t have an autofocus so I had to put the camera in to live-view, zoom in super close, adjust the focus until it looked clear, tap the focus ring down, and then zoom back out to take the picture. I took several pictures knowing that I was going to create an HDR image.

In post processing I used Photomatix to combine the images and then brought it into Photoshop. I played with the curves to bring out the highlights in the wood, and used levels to preserve the darker colors. I used a high pass filter to sharpen the details. I also used a color filter to put a little bit more blue into the sky, as well as brought in a little more cloud texture to make it seem a little more “eerie.”

The most difficult part was masking around the building to make it look normal. It took a lot of time, but it turned out well.

Video:

Project 7: Web Page

Project Screenshot:

P7MeganGrahamScreenshot


Description: A web page designed to showcase the logo that I created for my business.

Process (Programs, Tools, Skills):  This was my first time every using HTML and CSS. With the help of some class tutorials I was able to use a simple text editor, TextWrangler to enter in the proper codes to create the site. When I was finished I was able to use an HTML validator to double check that there were not any errors.

Once I got my html correct, I linked a CSS document to the HTML that served as a template. From there I was able to select the colors I had previously chosen for my logo using the eyedropper tool in Photoshop. From there I incorporated them into the design. I decided to use the same text from my logo on the site to create more unity.

I adjusted the padding and the margins to center-align the logo. I also placed a wedding photo that I recently took as the background to make it unique. Programs/Tools Used: TextWrangler & Photoshop

Message: An experienced photographer pursuing more jobs

Audience: Anyone looking for a photographer to take portraits. It is also a little geared towards wedding photography. I did this by specifically choosing a photo that I had taken of a bride’s bouquet.

Top Thing Learned: By using CSS, you can completely change the way a page looks.

Color scheme and color hex: Analogous: Teal #8dc6c3; Olive #b7c0a1; Brown #655C55; White #FFFFFF

Title Font Families & Category: “Avenir”, Arial, sans-serif

Copy Font Families & Category: “Palatino Linotype”, Book Antiqua, serif

Changes made to the CSS: I changed the font families and the colors to match my logo. I adjusted the margins and padding of my logo at the top. I adjusted the link hover color to make it more interactive. I changed the opacity of the white background in order to see the flower photo that I inserted as a background. I also fixed the background attachment so that when you scroll, the picture remains the same.

Photobook: Covers, TOC, First Spread, Professional Page

It was really exciting to start placing my photos together in Adobe InDesign for the photo book. I wanted to keep things really simple and basic, but I had a really difficult time at the beginning. It took a while to find which fonts I wanted to use, but once I did things got easier. For my cover, I liked the idea of using the layout we created last week. For the back I used the same image, but this time without the template so you can see the entire thing. It seemed like a simple, non-distracting photo, yet still interesting.

As I worked on my spread, it felt a little too plain and so I went into Photoshop and created a textured teal background that I later placed into InDesign. This improved the feel of it a lot. I struggled a little bit as to how to place my text, and towards the end I incorporated a low-opacity bar behind the second page of text.

Finally for my professional page, I chose a self-portrait that had a simple background with plenty of white space for text.


Front Cover:MeganGraham-Cover


Back Cover:MeganGraham-Back


Table of Contents: MeganGraham-Contents


Spread:
MeganGraham-spread


Professional Page:MeganGraham-professionalpage

Tasteful Typography

Fine Art Template:

MeganGrahamFinearttemplate

Themed Image Series: 

I wanted to use some inspirational quotes about tools to complete this project. Once I found a few that I liked, I browsed through my themed series and found images that I thought would work well with text. I unified these images by masking the background over the text when it crossed over the subject of the photo. On the titles, I also masked in very slightly a texture to give it a little more dimension.

Title: Prata Regular: Oldstyle
Body: Shree Devanagari 714; San Serif

MeganGraham-1Typography


MeganGraham2Typography


MeganGraham3Typography

MeganGraham4theme

MeganGraham5theme

MeganGraham6theme

MeganGraham7theme

MeganGraham9theme

MeganGraham10theme

MeganGraham8theme